AWS SSO can play a very important role for an organization to have a central access, authentication and authorization capacity. Different companies use different authentications for their users. Today I will be sharing about the AWS SSO with Azure Active Directory for Office365. This whole process was initiated by Brain Station 23 system admin team (specially Abdur Rahim) which can be helpful for others.
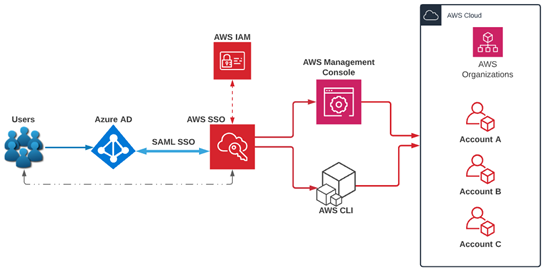
AWS Single Sign-On (SSO) with Azure Active Directory (AD)
SSO (single sign-on) is an authentication process that allows users to sign into multiple applications with a single set of usernames and passwords.
AWS SSO now provides a directory that you can use to create users, organize them into groups, and set permissions across those groups. You can also grant the users that you create in AWS SSO permissions to applications such as Office 365 and Azure AD.

AWS SSO also helps us manage access and permissions to commonly used third-party software. AWS SSO-integrated applications as well as custom applications that support Security Assertion Markup Language (SAML) 2.0. AWS SSO includes a user portal where your end-users can find and access all their assigned AWS accounts, cloud applications, and custom applications in one place.
Today, we will configure AWS SSO with Azure Active Directory and test our users together. Let’s start!
- Go to AWS Console and select AWS SSO from the console. Select “Enable AWS SSO”.

- Select “Choose your identity source.”

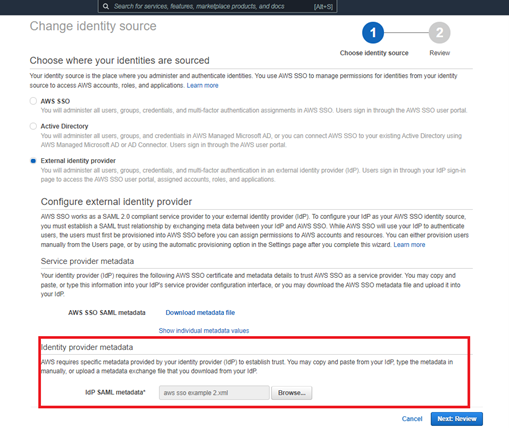
- Choose the external identity provider for your Azure AD. We need to download “AWS SAML metadata” from here. We need it in another step.

- On the Azure Cloud side, we need to create a new app from the Azure AD → Enterprise application→ New application →Create your own Application. When we create an application, we need to select “Integrate any other application you don’t find in the gallery (Non-gallery)”.

- After the application creation, it looks like this:

- In our Azure AD application, we need to select “Single sign-on” and set up Single Sign-on with SAML. We should upload the metadata files that we download before from the AWS SSO side.
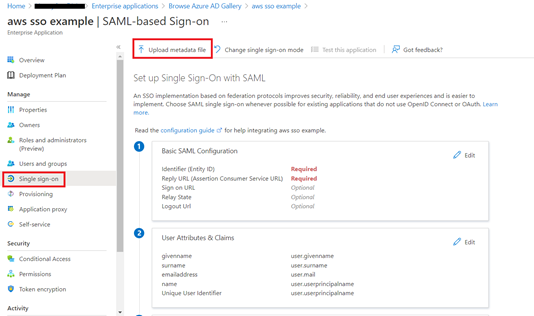
- After uploading SAML file, identifier and reply URL should be set from the SAML file. If the reply URL is not set, you cannot continue because it is a required field. You can get it from AWS SSO → Settings →Authentication →View details. AWS SSO ACS URL is your reply URL. Save all details here.

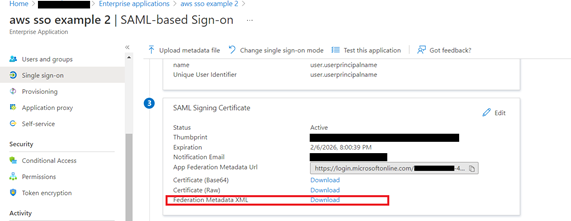
- We need to download SAML SSO XML metadata from the Azure side to upload AWS SSO.
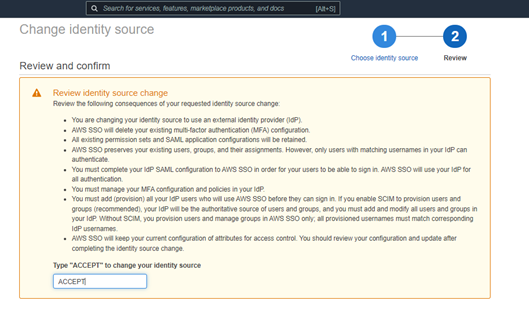
- Accept your changes.
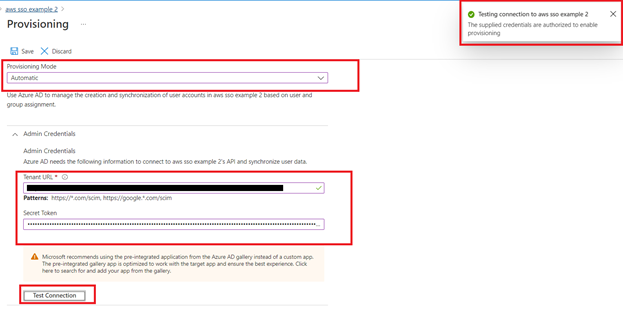
- After all these steps, we need to enable automatic provisioning. AWS SSO supports automatic provisioning (synchronization) of user and group information from your identity provider (IdP) into AWS SSO using the System for Cross-domain Identity Management (SCIM) v2.0 protocol. To enable it, we need to select the settings → provisioning part. Copy the SCIM endpoint and access token.
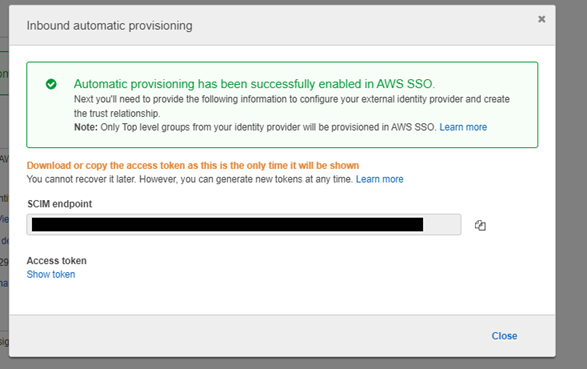
- Paste these credentials to Azure AD and test your connection.
- Now create Group and Add your users to the Group that we have created.

- Start provisioning. You can see the current cycle status. Your Azure AD users should be seen on the AWS SSO side.


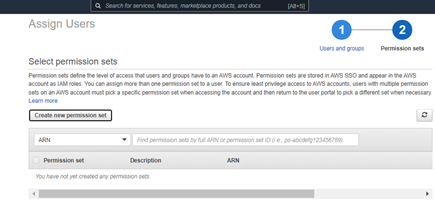
- We need to set our access control mechanism for AWS Management Console and AWS CLI side. To do this, we need to assign users to AWS accounts.

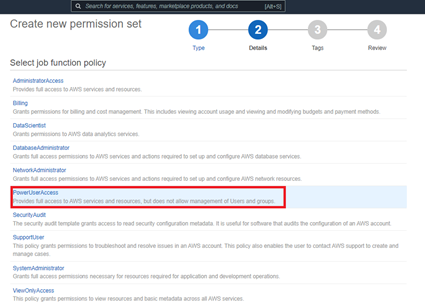
- Create a new permission set. We’re using an existing job function policy.

- For example, let’s assume our test user is a developer for AWS. We need to Power User Access.
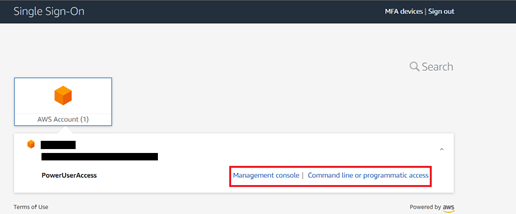
- After all these, we can use the user portal URL and SSO with your Azure AD credentials (e-mail and password).

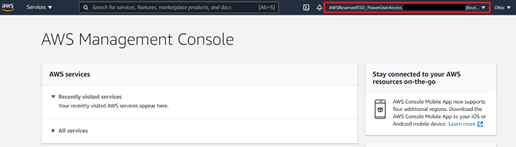
- After successful login, we can see AWS console successfully!